
Table of Contents
Step 1: Choose the Site for green living wall
Select a good spot for your green living wall. It needs enough natural light and the right kind of ventilation. When choosing the perfect location, take into account elements like the humidity and temperature of the space.
- Natural Lighting Choose a wall near a window or indirect sunlight for daytime natural light. Photosynthesis requires sunlight, therefore a well-lit wall helps keep your plants healthy.
- Ventilation: Make sure the wall has enough ventilation to keep air flowing around the plants. The right airflow keeps mold, mildew, and pests away and optimizes green wall growth.
- Space Availability: Choose a wall that has sufficient space to fit the dimensions and size of the green wall you want. Avoid walls with furniture, doors, or windows that may hinder installation or plant development.
- Room Temperature and Humidity: Consider the room temperature and humidity where the wall is. Most indoor plants flourish at 60-75°F (15-24°C) with 40-60% humidity. For your plants’ sake, pick a wall in a space with steady environmental conditions.
- Aesthetic Considerations: Consider the green wall’s aesthetics and how it will match the room’s dcor. Select a wall that creates a unified and aesthetically beautiful area by acting as a focal point or highlighting the current interior design features. Select a wall that draws attention or enhances the interior design, producing a harmonious and attractive space.
Step 2: Measure and Design
Take measurements of the wall that you want to decorate with greenery. Layout your design using these measurements. Choose the plant placement and spacing to create the desired visual appeal.
- Measure the Wall: Measure the wall where you’ll place the green wall with a tape measure. Utilize the space’s dimensions (height and width) as a guide for the design process.
- Consider Vertical Space: Consider vertical space for your green wall. Determining the maximum installation height from floor to ceiling. This measurement will determine how many plant rows or tiers you can accommodate.
- Draw a layout: Sketch your green wall plan on graph paper or a digital tool. Try various layouts until you discover one that suits your style and space.
- Mark Mounting Locations: Locate and mark the wall mounting places for the green wall frame or framework. Mark these points using a pencil or removable sticky tape based on your design plan. To hold the weight of the foliage, make sure the mounting points are positioned and spaced evenly.
Step 3: Selection the Plants
Choose a indoor-thriving plants that contrast well with one another in terms of growth patterns, color, and texture for your green living wall. Popular options include peace lilies, ferns, pothos, and spider plants. Make sure the plants you’ve chosen are appropriate for vertical gardening.
- Pothos (Epipremnum aureum): A low-to-medium-light vine with heart-shaped leaves that is versatile and easy to grow. Pothos gives your green wall luscious, trailing greenery.
- Spider Plant (Chlorophytum comosum): The spider plant has long, arching, striped leaves that are well-known for their ability to filter the air. It grows best in soil that drains properly and prefers , indirect light.
- Different species of ferns: Select fern species with airy fronds and a susceptibility for high humidity levels, such as maidenhair or Boston ferns. Ferns add a touch of elegance and lushness to your for your green living wall.
- Peace Lily (Spathiphyllum spp.): The peace lily adds a sense of calmness to any area with its glossy, dark green leaves and graceful white blossoms. This low-maintenance plant likes to be watered occasionally and grows well in dim light.
- Various varieties of philodendrons: These adaptable plants make excellent alternatives for for your green living wall because of their range of leaf colors, sizes, and forms. They like moderate watering and bright, indirect light.
- Sansevieria trifasciata, or snake plant: Snake plants are drought-tolerant, tough succulents with sword-shaped, erect leaves that are perfect for beginners. They take little care and can flourish in poor light.
Step 4: Collect necessary supplies for green living wall
A watering system, planting containers or pockets, potting soil, fertilizer, and mounting hardware are among the things you’ll need to collect. To keep your green wall healthy and long-lasting, use high-quality materials.
Plant Containers or Pockets:
Potting Soil: Avoid heavy garden soil
Fertilizer: Balanced liquid fertilizer formulated for indoor plants.
Watering System: Drip irrigation kits, self-watering planters, or manual watering
Mounting Hardware: Such as screws, anchors, brackets, or hooks, to secure the frame or structure onto the wall.
Additional Accessories: Such as decorative stones, moss, or LED grow lights.

Step 5: Install the Frame for green living wall
To support the weight of the plants and soil, attach a strong frame or additional structure to the wall. Consider a modular system for quick setup and maintenance. Make sure the frame is fixed to the wall firmly.
Step 6: Soil Preparation and Planting
Create a well-draining indoor plant potting mix. Use light garden soil to avoid root rot and drainage issues. To increase the aeration and structure of the soil, add perlite and organic matter.
Carefully place each foliage in its frame container or pocket. Remember the order and spacing specified in your design layout. After completely watering, gently press the earth around the roots.
Step 7: Watering System in Green living wall
Making sure your living green wall has enough moisture to thrive requires installing an effective watering system. Here’s how to install an irrigation system that works:
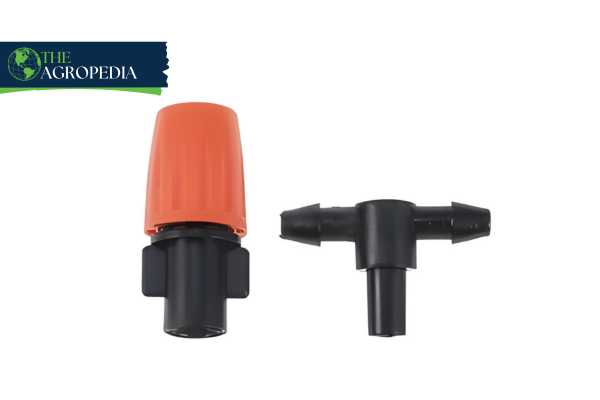
- Drip Irrigation: Use a drip irrigation system to water your green wall precisely and efficiently. Drip irrigation directly waters plant roots, decreasing water wastage and overwatering. Use drip emitters or micro-sprinklers to water the wall evenly.
- Hydroponic system: Hydroponic irrigation system supplies water and nutrients straight to plant roots without soil. Hydroponic systems are efficient and space-saving, making them ideal for vertical gardens. Choose an easy-to-maintain hydroponic system for indoor plants.
- Self-Watering Planters: Use self-watering planters or pots with reservoirs to keep plants hydrated. Self-watering planters reduce manual watering and maintain soil moisture. Choose planters with wicking or water level indicators for best results in for your green living wall.
- Manual Watering: Using a watering can or hose attachment, you may manually water your green wall. Hydrate the plants properly to avoid waterlogging the soil. Assess moisture levels and alter your watering plan as needed.
Step 8: Fertilization
Use a balanced liquid fertilizer for your green living wall that is designed specifically for indoor plants. To promote healthy growth and development, use a fertilizer that offers vital nutrients like potassium, phosphorus, and nitrogen.
Step 9: Pruning and Maintenance
Inspect your green wall frequently for any indications of disease, overgrowth, or pests. To encourage fresh development and preserve the general health of the plants, remove any dead or yellowing leaves. Dust and debris should be removed from the wall’s surface.
Step 10: Lighting and Monitoring
Make sure there is enough light on your for your green living wall for photosynthesis. If needed, artificial grow lights can be used to supplement natural light, particularly in places with little exposure to sunlight. To prevent burning the leaves, place the lights at the proper distance.
Observe your for your green living wall’s development and health with careful monitoring. Monitor moisture content, nutritional deficits, and any indications of injury or stress. To maintain plant health, adjust environmental and care conditions.